There’s something magical about homemade pizza dough. The way it comes together from just four simple ingredients. The satisfying feel of kneading it by hand. The proud moment when you pull a golden, bubbly crust from your oven. Store-bought dough is convenient, but making pizza dough from scratch transforms dinner into something special—and it’s easier than you think.
This recipe delivers a perfectly balanced dough every time: crisp on the outside, tender and chewy on the inside, with just enough flavor to complement any topping. No fancy equipment required. Just flour, water, yeast, salt, and a little patience. Once you master this, you’ll never go back to store-bought.
—
Why Homemade Pizza Dough Is Worth It
The flavor alone makes homemade dough worthwhile. Commercial dough sits on shelves for days, losing the fresh yeast character that gives pizza its soul. Homemade dough tastes like a pizzeria—crispy edges, airy crumb, and that distinct fermented flavor that comes from letting the dough rest properly.
Then there’s the texture. Store-bought dough often turns out cracker-like or dense. When you make it yourself, you control every variable. A long, slow rise develops gluten naturally, creating a crust that’s simultaneously crisp and chewy. You can stretch it thin for a Roman-style pizza or leave it thick for deep dish. The choice is yours.
Cost matters too. A batch of homemade dough costs pennies compared to store-bought. Four basic ingredients—flour, water, yeast, salt—make enough dough for two large pizzas that feed a family. That’s about $1 worth of ingredients versus $5 to $7 for pre-made dough at the grocery store.
Plus, there’s the satisfaction factor. That moment when you pull a perfect pizza from your own oven, knowing you built it from scratch, never gets old. It’s cooking at its most rewarding.
—
Ingredients for Perfect Pizza Dough
Great pizza starts with great ingredients. Each one plays a specific role in creating that perfect crust. Here’s what you need:
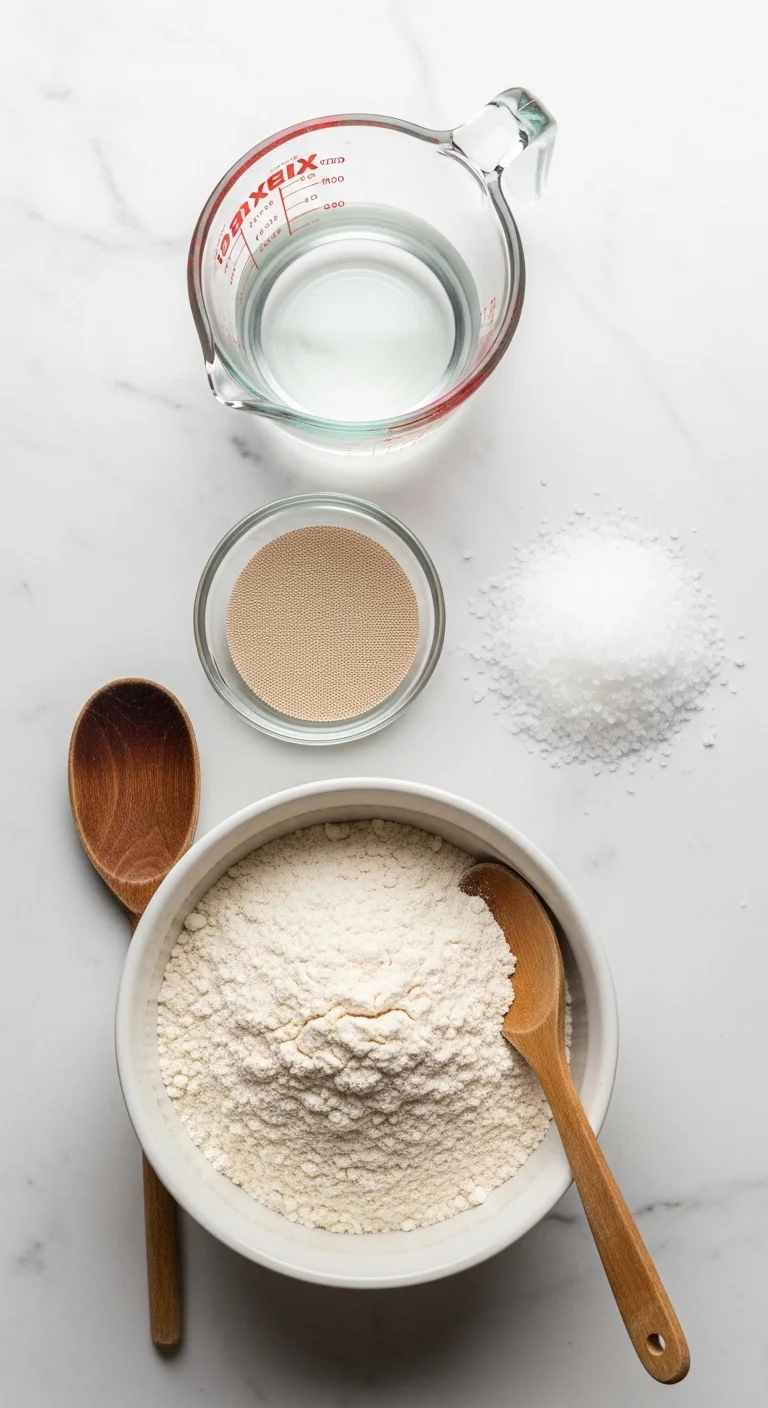
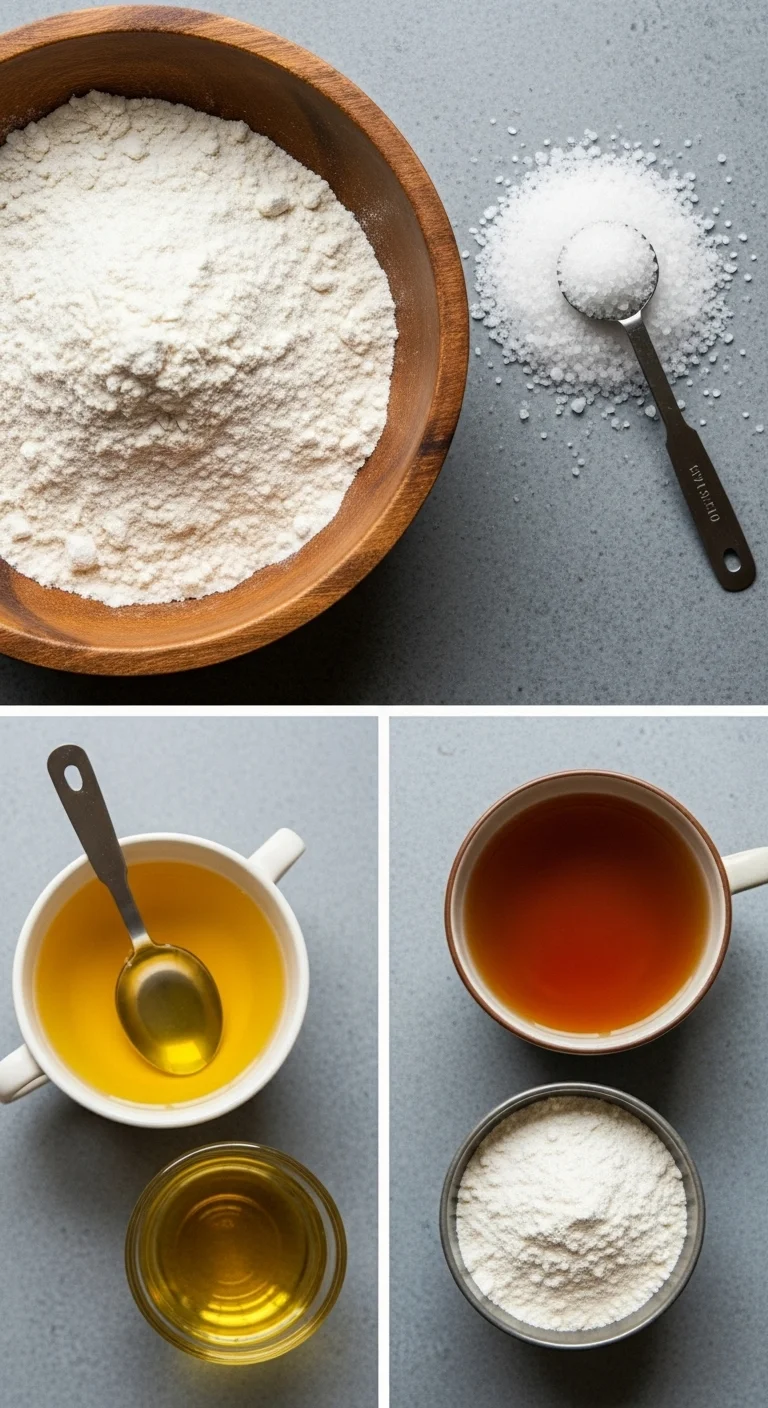
Flour: 500 grams (about 4 cups) of bread flour or tipo 00 flour. Bread flour has higher protein content than all-purpose, which means more gluten development and a chewier, crispier crust. Tipo 00 flour is finely ground Italian flour that produces an incredibly tender yet crisp crust. If you only have all-purpose flour, it will work—but the texture won’t be quite the same.
Water: 325 grams (about 1⅓ cups) of warm water, around 105°F to 110°F. Water that’s too hot will kill the yeast. Too cold, and the yeast won’t activate. Aim for bathwater temperature—warm but not hot to the touch.
Yeast: 2 teaspoons of active dry yeast or instant yeast. Active dry needs to be proofed in warm water first; instant yeast can be mixed directly with the flour. Both work beautifully. For a slower fermentation that develops more flavor, use half the amount of yeast and let the dough rise longer.
Salt: 10 grams (about 2 teaspoons) of fine sea salt. Salt does more than season—it strengthens gluten and controls yeast activity for a more balanced rise. Don’t skip it.
Olive Oil: 2 tablespoons of extra virgin olive oil. This is optional but adds richness and helps create a crispier bottom crust. A little goes a long way.
Equipment: A large mixing bowl, a wooden spoon or dough whisk, and a clean surface for kneading. A kitchen scale is highly recommended for accuracy, but measuring cups work too.
—
How to Make Pizza Dough: Step by Step
Step 1: Activate the Yeast
In a small bowl, combine the warm water with the yeast. If using active dry yeast, let it sit for 5 to 10 minutes until it becomes foamy and fragrant. This tells you the yeast is alive and ready to work. For instant yeast, you can skip this step and mix it directly with the flour.
Step 2: Mix the Dry Ingredients
In a large mixing bowl, whisk together the flour and salt. If you’re using instant yeast, add it now. Make a well in the center of the flour mixture—a small crater where you’ll pour the liquid.
Step 3: Bring It Together
Pour the yeasted water into the well. Add the olive oil if using. Using a wooden spoon or your hands, stir the mixture until a shaggy dough forms. It will look rough and uneven—that’s exactly what you want at this stage. Scrape any dry flour from the bottom and sides of the bowl.
Step 4: Knead the Dough
Turn the dough out onto a lightly floured surface. Knead for 8 to 10 minutes, using the heel of your hand to push the dough away, then fold it back. The dough will start sticky but become smoother and more elastic as you work. It’s ready when it springs back slowly when poked with a finger. If you’re using a stand mixer with a dough hook, knead on medium-low speed for 6 to 8 minutes.
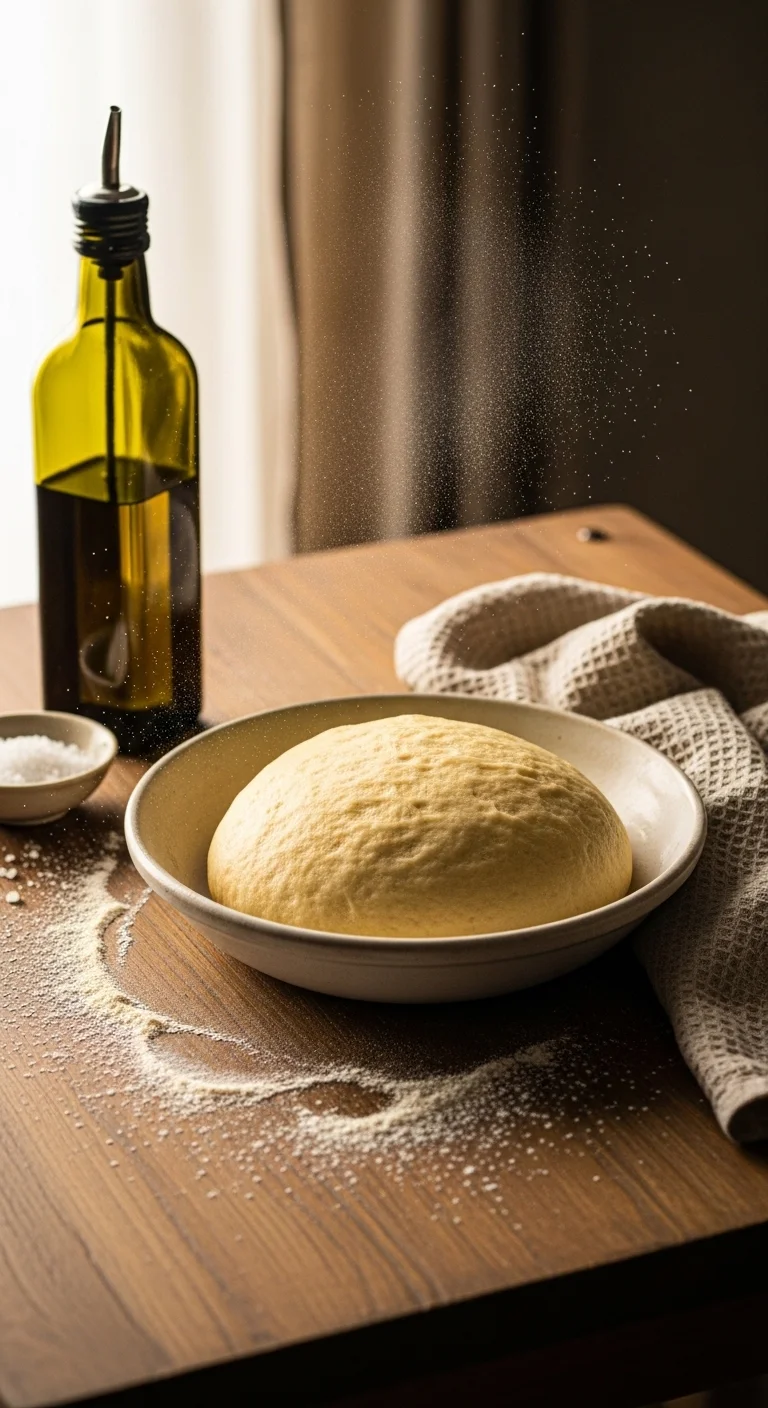
Step 5: First Rise
Shape the dough into a smooth ball. Lightly oil a large bowl and place the dough inside, turning to coat all sides. Cover with plastic wrap or a damp kitchen towel. Let it rise in a warm spot until doubled in size—about 1 to 2 hours depending on room temperature. A slightly warm oven (turned off) with the light on works perfectly.
Step 6: Shape and Second Rise
Punch down the dough to release air. Divide into two equal portions for two 12-inch pizzas. Shape each into a tight ball. Place them on a lightly floured surface, cover, and let rest for 15 to 30 minutes. This second rest makes the dough easier to stretch without springing back.
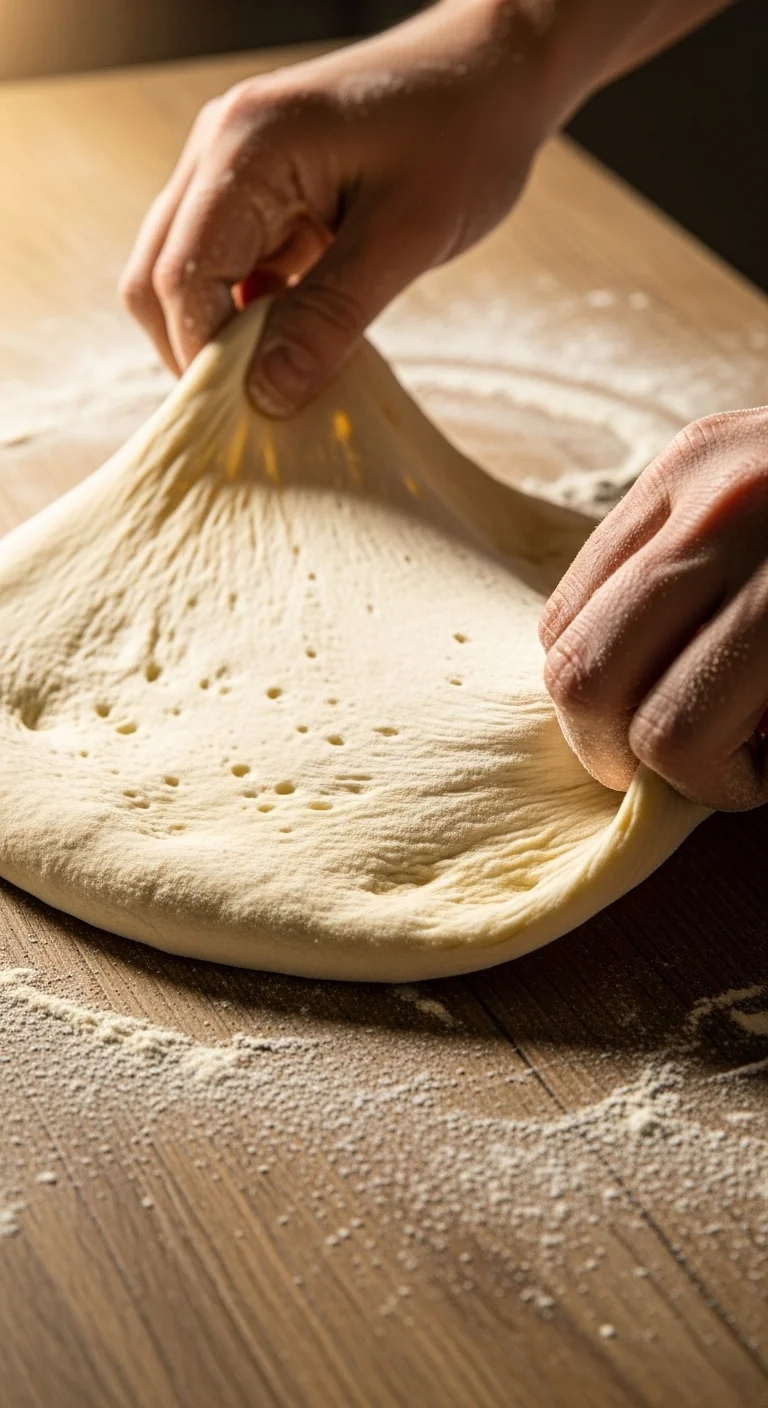
Step 7: Stretch and Top
Press each dough ball into a flat disc with your fingertips. Gently stretch from the center outward, rotating as you go. Use the backs of your hands to stretch larger circles, letting gravity do the work. Don’t use a rolling pin—it pushes out the air bubbles that create that beautiful, airy crust. Place the stretched dough on a floured pizza peel or parchment-lined baking sheet. Add your toppings and bake immediately at the highest temperature your oven allows (500°F or higher) for 10 to 12 minutes until golden and bubbling.
—
Pro Tips for Bakery-Quality Pizza Dough

Weigh Your Ingredients
Flour settles in measuring cups, and a cup can vary by 20 grams or more. A kitchen scale ensures consistent results every time. 500 grams of flour and 325 grams of water give you a perfect 65% hydration dough—the sweet spot for an easy-to-handle dough that produces a crisp yet tender crust.
Cold Ferment for More Flavor
The single best trick for amazing pizza dough is time. After the first rise, punch down the dough, wrap tightly, and refrigerate for 24 to 72 hours. Slow fermentation develops complex, tangy flavors that mimic high-end pizzerias. Bring the dough to room temperature for two hours before shaping. This is the secret pizzeria owners don’t tell you.
Use the Right Flour
Bread flour or tipo 00 flour makes a noticeable difference. Their higher protein content creates stronger gluten, which means a crispier crust with better structure. All-purpose flour works in a pinch, but the texture won’t have that same chewy-crisp balance.
Get Your Oven Hot
Home ovens rarely reach the 800°F temperatures of pizza ovens, so you need to maximize what you have. Preheat your oven with a baking steel or stone inside at 500°F for at least 45 minutes. The retained heat creates that immediate oven spring that gives you puffy, charred crust edges. If using a baking sheet, preheat it empty for 15 minutes before adding your pizza.
Don’t Overwork the Toppings
Less is more on pizza. Too many toppings weigh down the crust, creating a soggy center. Use quality ingredients sparingly. The dough deserves to shine.
—
Creative Variations to Try
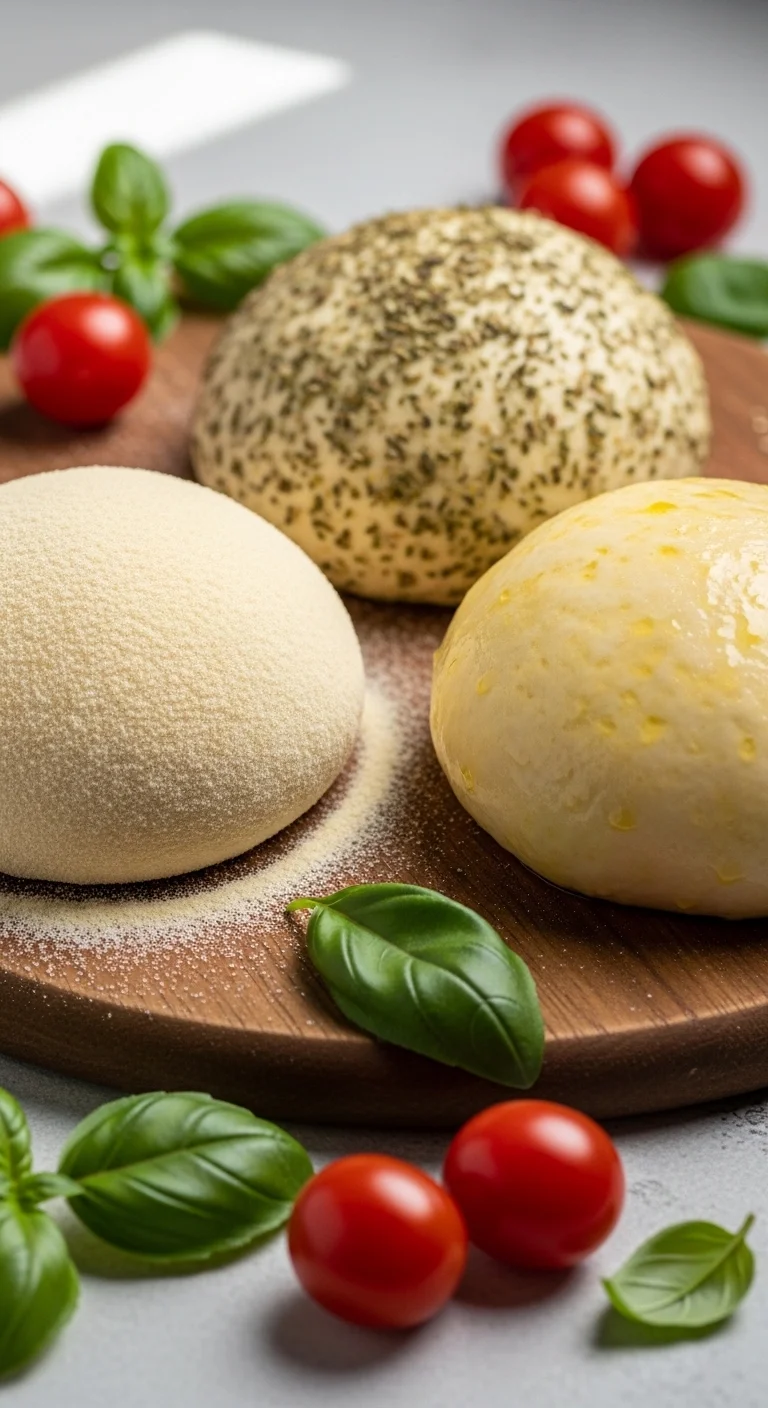
Once you master the basic recipe, these variations add new dimensions:
Whole Wheat Pizza Dough
Replace half the bread flour with whole wheat flour. Add an extra tablespoon of water—whole wheat absorbs more liquid. The result has a nutty, earthy flavor that pairs beautifully with hearty toppings like sausage and mushrooms.
Garlic and Herb Dough
Knead two minced garlic cloves, two tablespoons of chopped fresh rosemary or oregano, and a pinch of red pepper flakes into the dough during the final stages of mixing. This aromatic dough needs only simple toppings—a drizzle of olive oil and flaky salt—to shine.
Semolina Dough
Replace 100 grams of bread flour with fine semolina flour. The semolina adds a beautiful golden color and a slightly crunchier texture. It’s traditional for Roman-style pizza al taglio.
Gluten-Free Pizza Dough
Gluten-free pizza requires a different approach. Use a gluten-free flour blend specifically formulated for bread baking, add xanthan gum if it’s not already included, and increase hydration slightly. The dough will be stickier, so handle it on parchment paper and bake directly on a preheated stone.
Sourdough Pizza Dough
Replace the commercial yeast with 150 grams of active sourdough starter. Reduce the water to 250 grams initially, then adjust as needed. Let the dough rise slowly—six to eight hours at room temperature or overnight in the refrigerator. The tangy flavor is worth the extra time.
—
Serving Suggestions for Your Pizza
Great pizza deserves great accompaniments. Here’s how to serve it:
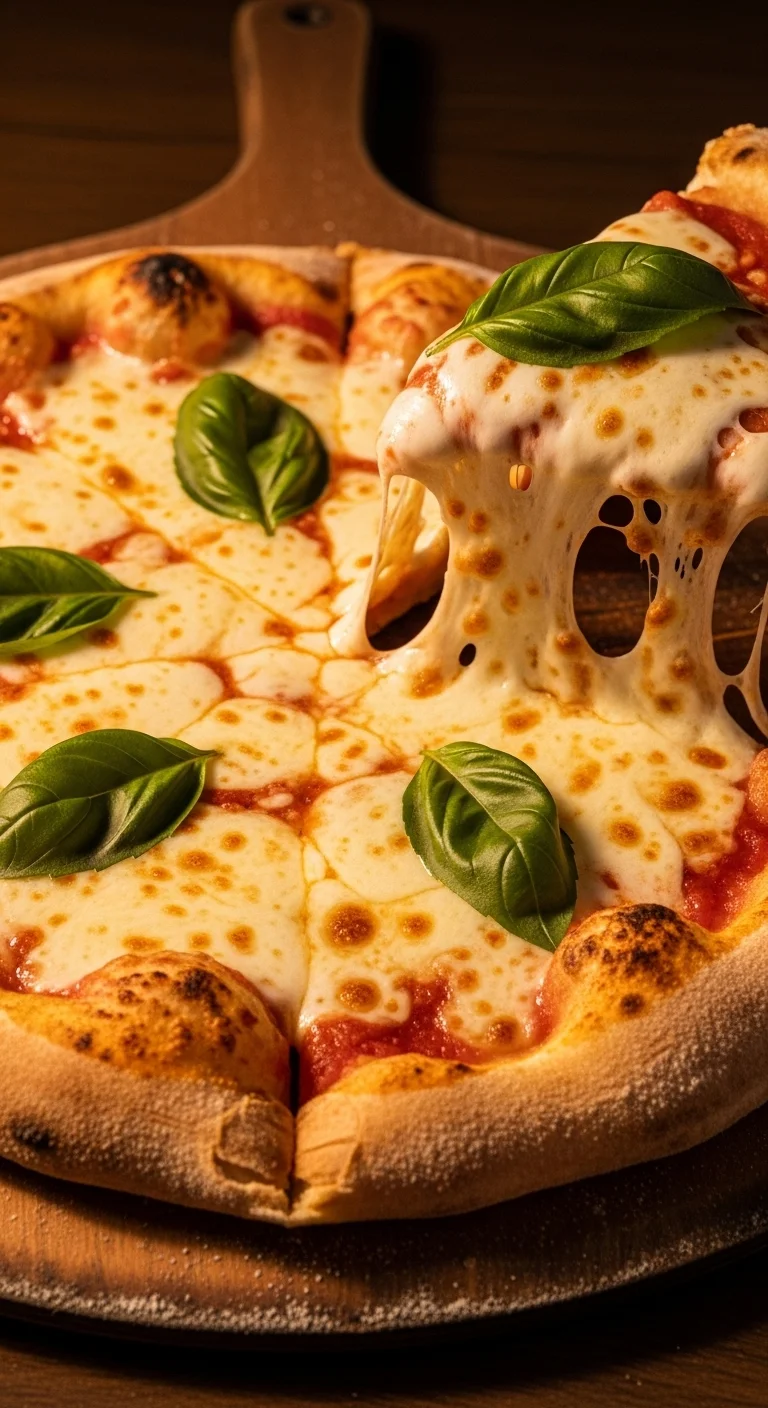
Classic Margherita
Keep it simple with crushed San Marzano tomatoes, fresh mozzarella, basil leaves, and a drizzle of olive oil. This minimalist approach lets the dough’s flavor and texture take center stage.
White Pizza
Skip the tomato sauce. Spread ricotta mixed with garlic and lemon zest over the dough, top with mozzarella, and finish with arugula and prosciutto after baking. The creamy base pairs beautifully with the crisp crust.
Vegetable Pizza
Thinly sliced zucchini, eggplant, bell peppers, and red onions roasted or grilled before topping prevents sogginess. Scatter over the sauce, add fresh mozzarella, and finish with a sprinkle of pecorino Romano.
Pizza Party Setup
For gatherings, make extra dough and set up a topping bar. Guests stretch their own dough and choose their combinations. Pre-cook mushrooms and sausage, slice vegetables thinly, and offer a variety of cheeses. The interactive element makes the meal memorable.
Beverage Pairings
A cold lager or IPA cuts through the richness of cheese. For wine, choose a medium-bodied red like Chianti or a crisp Pinot Grigio. Non-alcoholic options like sparkling water with lemon or Italian soda work just as well.
—
Common Problems and Solutions
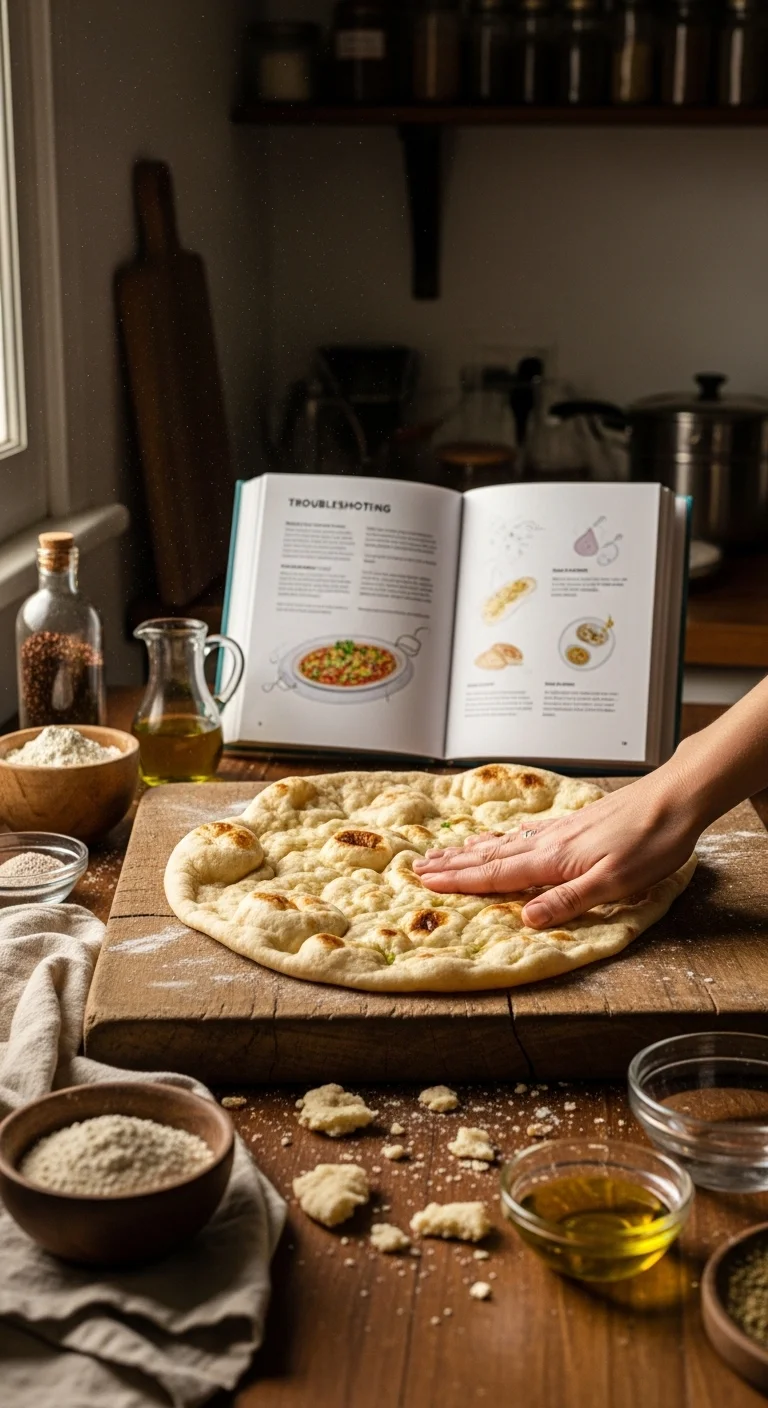
Problem: Dough Won’t Stretch
If the dough keeps snapping back, it needs more rest. Cover it and let it sit for 10 to 15 minutes. The gluten relaxes with time, making stretching easier. Rushing this step is the most common mistake new pizza makers make.
Problem: Crust Is Soggy
Soggy crust usually means too many wet toppings. Cook mushrooms and vegetables before adding them to release excess moisture. Use sauce sparingly—a thin layer goes a long way. And always preheat your baking surface thoroughly. A hot stone or steel creates immediate steam that sets the crust before toppings release their liquid.
Problem: Dough Is Too Sticky
Sticky dough means too much water or not enough kneading. Avoid adding too much flour during shaping—it makes the crust tough. Instead, wet your hands with cold water when handling sticky dough. The water prevents sticking without adding flour. For future batches, reduce water by 10 to 15 grams.
Problem: Crust Is Tough
Tough crust comes from over-kneading or using too much flour during shaping. Knead just until the dough is smooth and elastic—about 8 minutes by hand. When shaping, use flour sparingly. A little sticking is normal.
Problem: Dough Didn’t Rise
If your dough didn’t double, the yeast may be dead. Test it by proofing in warm water with a pinch of sugar—if it doesn’t foam within 10 minutes, replace it. Also, cold kitchen temperatures slow rising. Find a warm spot near the oven or inside a turned-off oven with the light on.
—
Storing and Freezing Pizza Dough
Homemade pizza dough freezes beautifully, making it perfect for meal prep.
Refrigerator Storage
After the first rise, punch down the dough and wrap tightly in plastic wrap. Store in the refrigerator for up to three days. The cold ferment develops deeper flavor. Bring to room temperature for two hours before shaping and baking.
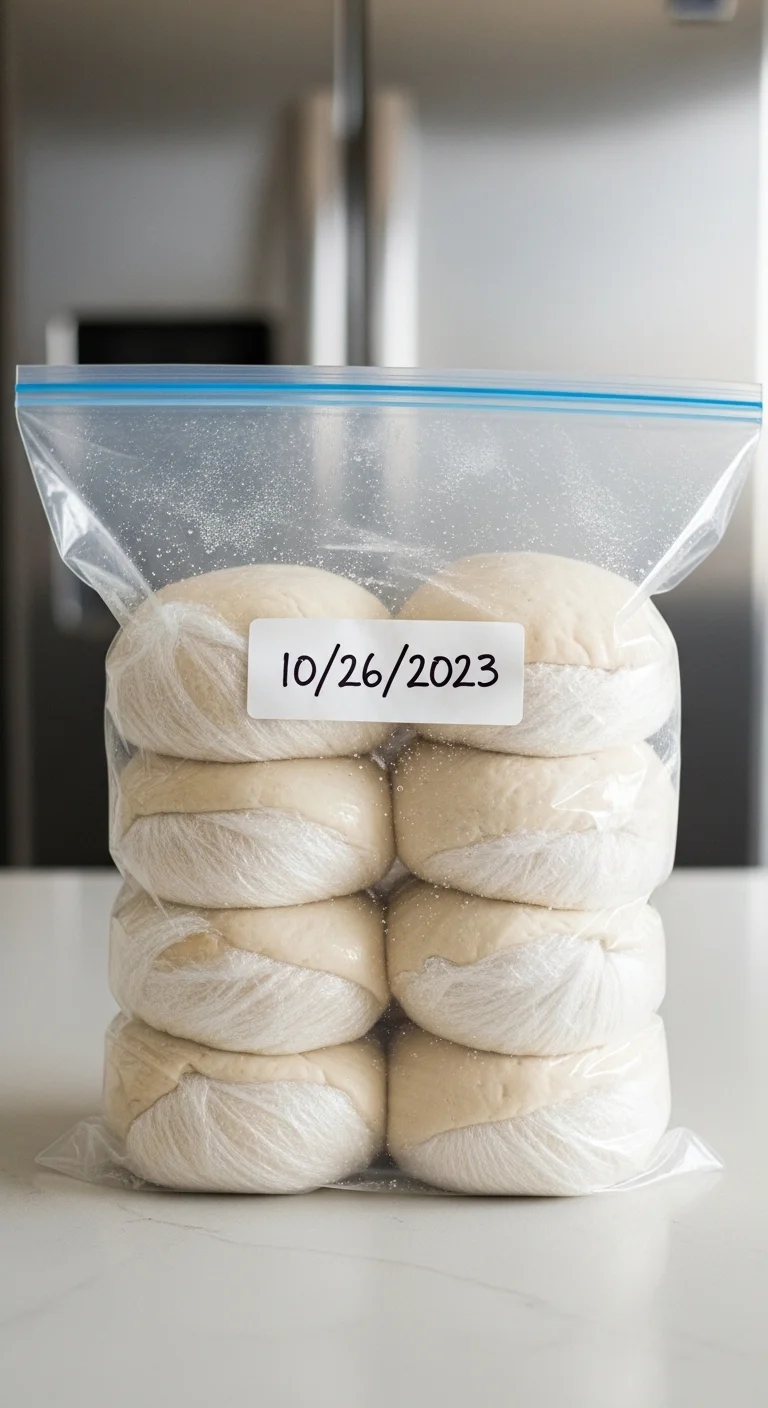
Freezer Storage
Portion the dough after the first rise. Wrap each ball tightly in plastic wrap, then place in a freezer-safe bag. Label with the date. Dough keeps for up to three months. To use, thaw overnight in the refrigerator, then bring to room temperature for two hours before shaping.
Make-Ahead Dough
For busy weeks, make a double batch and freeze half. Having pizza dough ready in the freezer turns last-minute dinner decisions into something special. Simply pull out a ball in the morning, and by dinner time it’s ready to stretch and top.
—
Conclusion
Making pizza dough from scratch is one of those kitchen skills that pays dividends for years. Once you understand the rhythm—mix, knead, rise, stretch—it becomes second nature. The dough practically makes itself. You’ll find yourself planning pizza nights, experimenting with toppings, and enjoying the simple pleasure of food made with your own hands.
Start with this recipe. Master the basic technique. Then let your creativity take over. Add herbs to the dough. Try a cold ferment for deeper flavor. Experiment with different flours. Each pizza will be slightly different, and that’s part of the beauty.
Your family will notice. Friends will ask for your recipe. And you’ll never again settle for grocery store dough that sits on a shelf for days. Because now you know: great pizza starts with great dough, and great dough starts with you.
—
Homemade Pizza Dough Recipe
Prep Time: 15 minutes
Rise Time: 1 to 2 hours
Total Time: About 2 hours (plus optional cold ferment)
Yield: 2 pizzas (12-inch each) or 4 personal pizzas
Calories: About 250 per serving (1/8 of dough)
Ingredients
- 500 grams (about 4 cups) bread flour or tipo 00 flour, plus more for dusting
- 325 grams (about 1⅓ cups) warm water (105°F to 110°F)
- 2 teaspoons active dry yeast or instant yeast
- 10 grams (about 2 teaspoons) fine sea salt
- 2 tablespoons extra virgin olive oil (optional)
Instructions
- If using active dry yeast, combine warm water and yeast in a small bowl. Let sit for 5 to 10 minutes until foamy. For instant yeast, skip this step.
- In a large mixing bowl, whisk together flour and salt. If using instant yeast, add it now. Make a well in the center.
- Pour the yeasted water and olive oil into the well. Stir with a wooden spoon or your hands until a shaggy dough forms.
- Turn the dough onto a lightly floured surface. Knead for 8 to 10 minutes until smooth and elastic. The dough should spring back slowly when poked. Alternatively, use a stand mixer with a dough hook on medium-low speed for 6 to 8 minutes.
- Shape the dough into a ball. Place in a lightly oiled bowl, turning to coat. Cover with plastic wrap or a damp towel. Let rise in a warm spot until doubled in size, about 1 to 2 hours.
- Punch down the dough to release air. Divide into two equal portions for two 12-inch pizzas. Shape each into a tight ball. Cover and let rest for 15 to 30 minutes.
- Preheat oven to 500°F with a baking stone or steel inside, or use a baking sheet. Stretch each dough ball into a 12-inch circle using your hands—avoid a rolling pin. Top as desired.
- Bake for 10 to 12 minutes until crust is golden and toppings are bubbling. Let cool slightly before slicing.
Notes
- For deeper flavor, refrigerate dough for 24 to 72 hours after the first rise. Bring to room temperature before shaping.
- Freeze extra dough after the first rise. Wrap tightly in plastic, then place in a freezer bag. Keeps for up to 3 months.
- For crispier crust, preheat your baking surface for at least 45 minutes.
Nutrition Information (Per 1/8 of dough, without toppings)
- Calories: 250
- Total Fat: 3.5g
- Sodium: 480mg
- Total Carbohydrates: 47g
- Dietary Fiber: 2g
- Protein: 8g
Keyword: homemade pizza dough, easy pizza dough recipe, best pizza dough, pizza dough from scratch, Italian pizza dough

Hi, I’m Madison Blake — a home cook and recipe developer based in the United States. I created Bite Queen to share easy, comforting recipes that anyone can make at home, no culinary school required. I believe the best meals are simple, satisfying, and made with everyday ingredients. When I’m not testing recipes in my kitchen, I’m exploring new flavors and finding ways to make home cooking more enjoyable for everyone. Every recipe on Bite Queen has been personally tested and approved at my own dinner table.