Few things capture the spirit of Christmas like a cozy afternoon decorating cookies — especially when everything is prepped, packed, and ready to go! DIY Christmas Cookie Decorating Kits are the perfect holiday gift for families, kids, friends, or even clients. They’re fun, interactive, and easy to make at home — no bakery required.
Here’s how to make your own professional-looking (but budget-friendly) cookie kits that everyone will love unwrapping and using this holiday season.
1. Bake the Perfect Base Cookies
Start with sturdy, neutral-flavored cookies that hold their shape and are easy to decorate. Sugar cookies and gingerbread cookies are classic choices.
2. Best cookie bases:
- 🎄 Sugar Cookies – smooth surface, perfect for icing.
- 🍪 Gingerbread Cookies – festive, spiced, and aromatic.
- ⭐ Shortbread Cookies – buttery and simple for colorful toppings.
3. Tips for success:
- Use metal cookie cutters for crisp edges.
- Chill dough before cutting to prevent spreading.
- Bake cookies until just golden — overbaked ones get too hard to decorate.
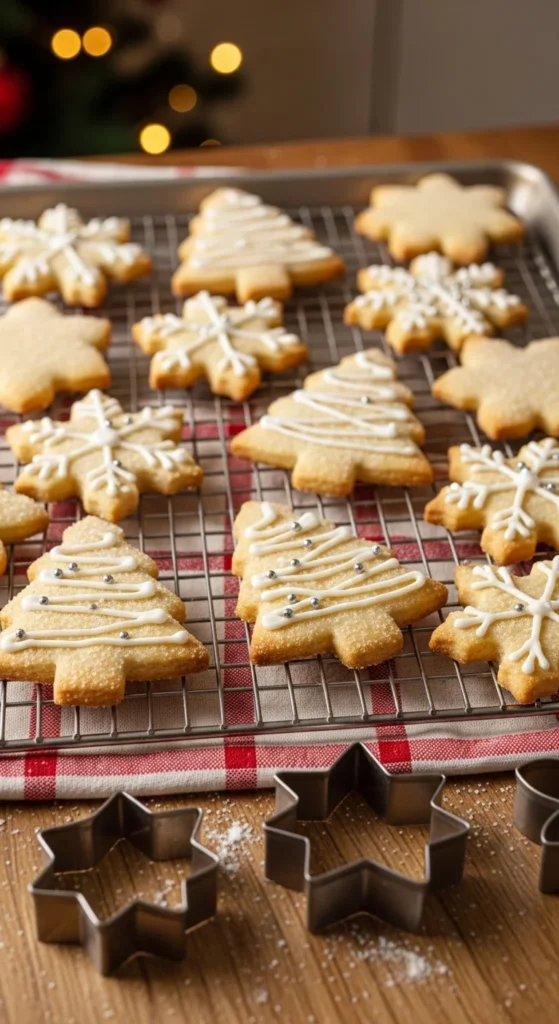
Pro tip: Bake 24 hours before assembly so cookies cool completely — you’ll avoid condensation inside the kits.
4. Prepare Royal Icing (the Secret Weapon)
Royal icing is what gives cookies that glossy, professional finish — and it stores beautifully.
5. Basic royal icing recipe:
- 3 cups powdered sugar
- 2 tablespoons meringue powder (or 2 egg whites)
- 4–5 tablespoons water
- 1 teaspoon vanilla or almond extract
6. Beat until smooth and slightly thick (like toothpaste consistency).
7. Color & package:
- Divide icing into bowls.
- Tint with food coloring (red, green, white, blue, gold).
- Spoon each color into small piping bags or squeeze bottles.
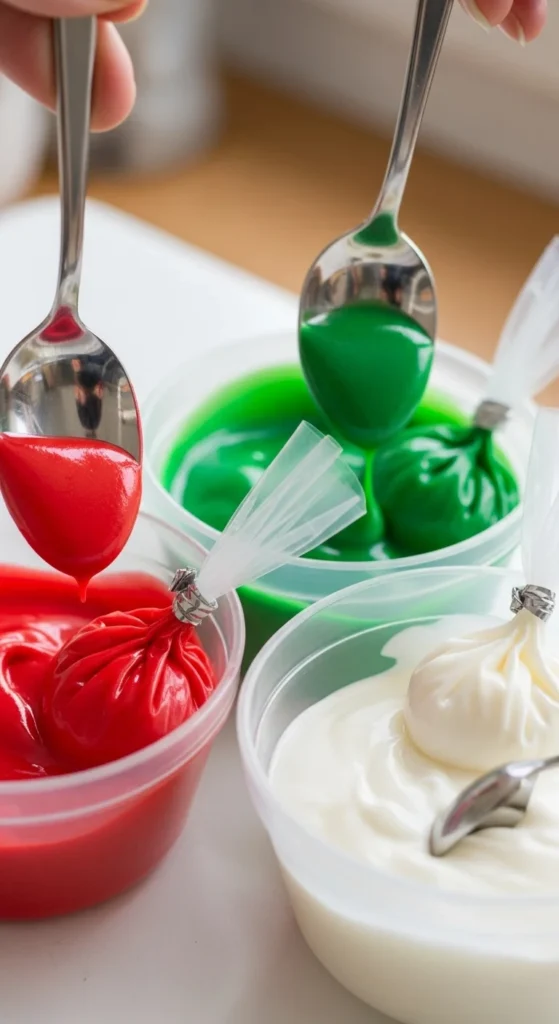
8. Pro tip: Use gel colors for vibrant hues that don’t thin out the icing.
9. Add Fun Edible Decorations
This is the part that makes your kit exciting! Mix textures, colors, and shapes for a festive spread of toppings.
10. Ideas for cookie decorations:
- 🎉 Colored sprinkles and sanding sugar
- 🍫 Mini chocolate chips
- ❄️ Snowflake or star-shaped candies
- ❤️ Red and green M&Ms or candy pearls
- 🌰 Crushed peppermint or coconut flakes
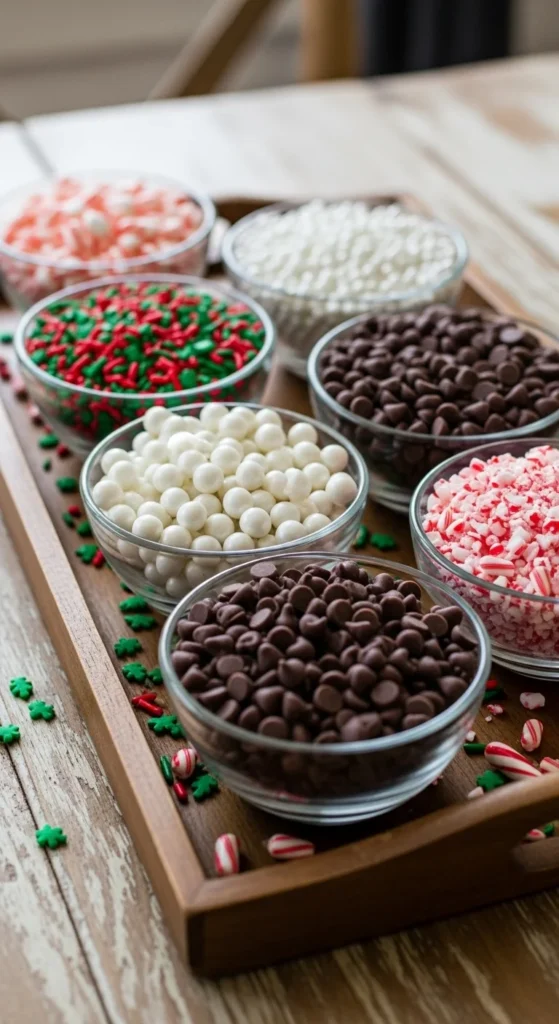
Packaging tip:
Place each topping in a mini plastic cup with lid, zip bag, or small jar to keep them fresh and tidy.
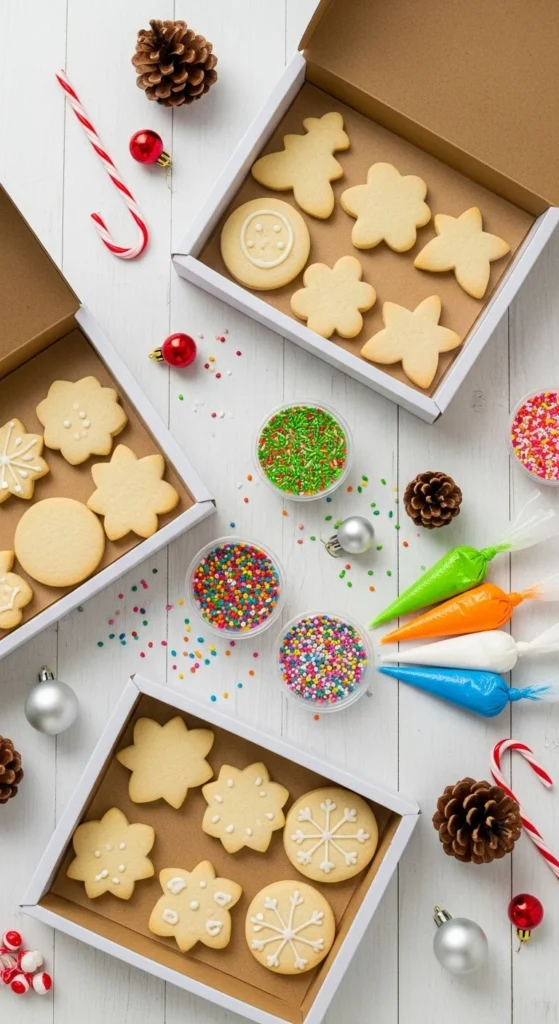
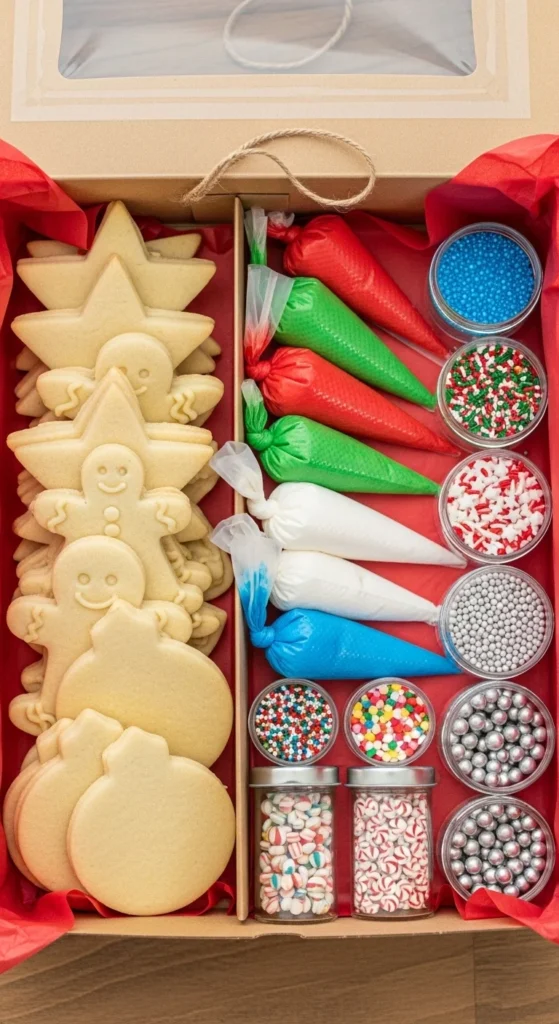
11. Assemble Your Kits Like a Pro
12. Now the fun part — putting it all together! Think of your kit as a mini bakery-in-a-box.
13. You’ll need:
- A sturdy box, bakery box, or clear plastic container
- Tissue or parchment paper to line the bottom
- Space dividers (cupcake liners or small cardboard pieces work perfectly)
14. How to assemble:
- Stack cookies neatly in a row or separate section.
- Add icing bags in another compartment.
- Arrange toppings attractively in front or side sections.
- Tuck in a small instruction card.
15. Pro tip: Add a disposable piping tip or toothpicks for fine details.
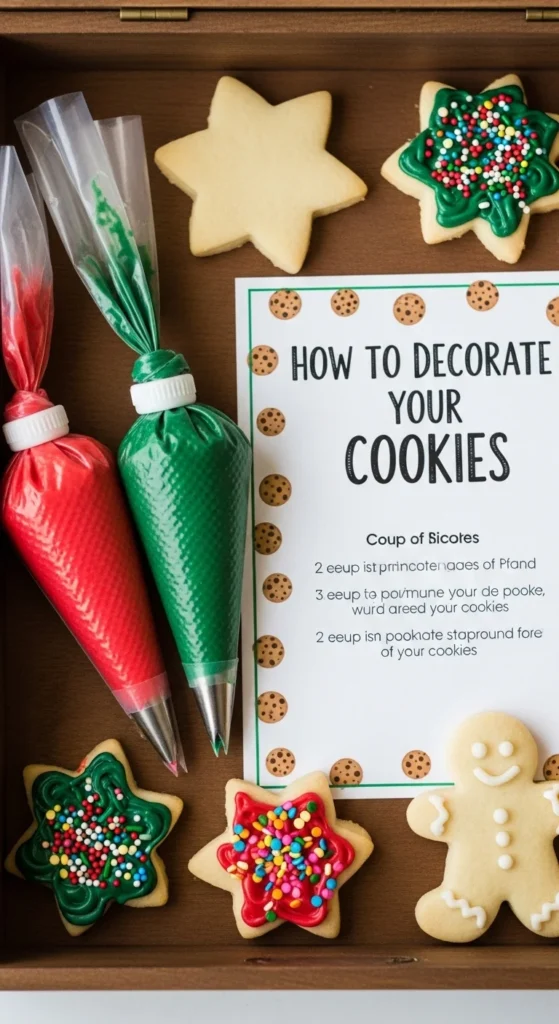
16. Include an Instruction Card
Even though it’s simple, adding a printed or handwritten guide makes your kit feel complete and boutique-quality.
17. What to include:
- “How to Decorate Your Cookies” steps
- Short baking or softening tip (e.g., “Microwave icing bag for 5 seconds if stiff.”)
- Storage directions: “Keep cookies in an airtight container up to 1 week.”
- A cheerful message like “Merry Christmas from our kitchen to yours!”
Bonus idea: Add a QR code that links to a short video demo if you’re gifting to clients or customers.
18. Dress Up the Packaging
Presentation turns your DIY kit into a gift. You can keep it simple or make it boutique-style depending on your budget.
19. Easy packaging upgrades:
- Wrap the entire box in clear cellophane with a big bow.
- Use kraft bakery boxes with a window for that artisanal look.
- Add stickers, tags, or labels (“DIY Christmas Cookie Kit!”).
- Decorate with pine sprigs, dried oranges, or mini ornaments.
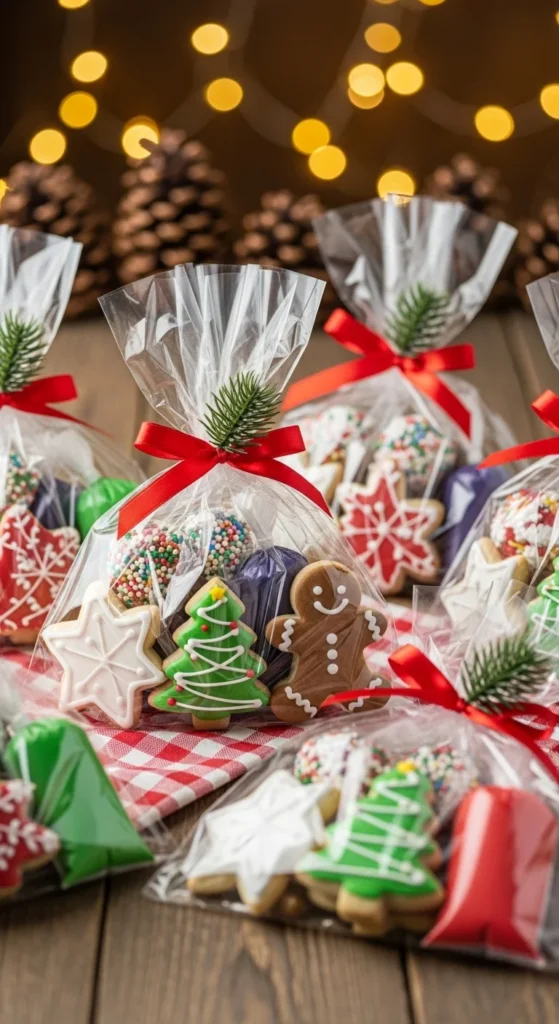
Pro tip: Choose one consistent color palette — red and gold, white and green, or rustic kraft tones — for a professional finish.
20. Store and Deliver Safely
21. Keep your kits fresh and beautiful until delivery.
22. Storage tips:
- Store cookies at room temperature in airtight containers.
- Keep icing refrigerated if not gifting within 24 hours.
- Deliver kits within 2–3 days of baking.
23. Delivery ideas:
- Hand-deliver with a card or tag.
- Stack kits in a small crate or basket if gifting to several families.
- Add a festive note: “Have fun decorating and making sweet memories!”

24. The Takeaway
DIY Christmas Cookie Decorating Kits are fun, thoughtful, and surprisingly easy to make — no professional bakery required. They bring families together, spark creativity, and deliver delicious holiday joy in the most charming way.
Whether you’re gifting one or twenty, these kits are guaranteed to spread smiles (and sprinkles!) all season long.
✨ Save this guide and make your own Christmas cookie kits this weekend — perfect for kids, neighbors, or classroom gifts!